

Get Rid Of Perspective Grid Tool Illustrator
In this Illustrator tutorial I'll show you how to set up a three-point perspective grid in Adobe Illustrator to create a gorgeous 3D gift box. You can either place existing artwork in a perspective plane or draw directly on to the grid. We'll use both methods in this tutorial, and as a bonus I'll show you an easy way to create a reflection.
We'll start right from the beginning of the process, so even if you are a beginner Illustrator user, our step-by-step guide will have you creating impressive perspective in no time (see our guides to one-point perspective and how to draw perspective to get your head around the basics).
You can get to grips with other areas of Illustrator with our roundup of the best Illustrator tutorials.
Click on the icon at the top-right of the image to enlarge it.
01. Create a new file

First create a new document by going to 'File > New'. It can be of any size; we are using 800px width and 600px height here.
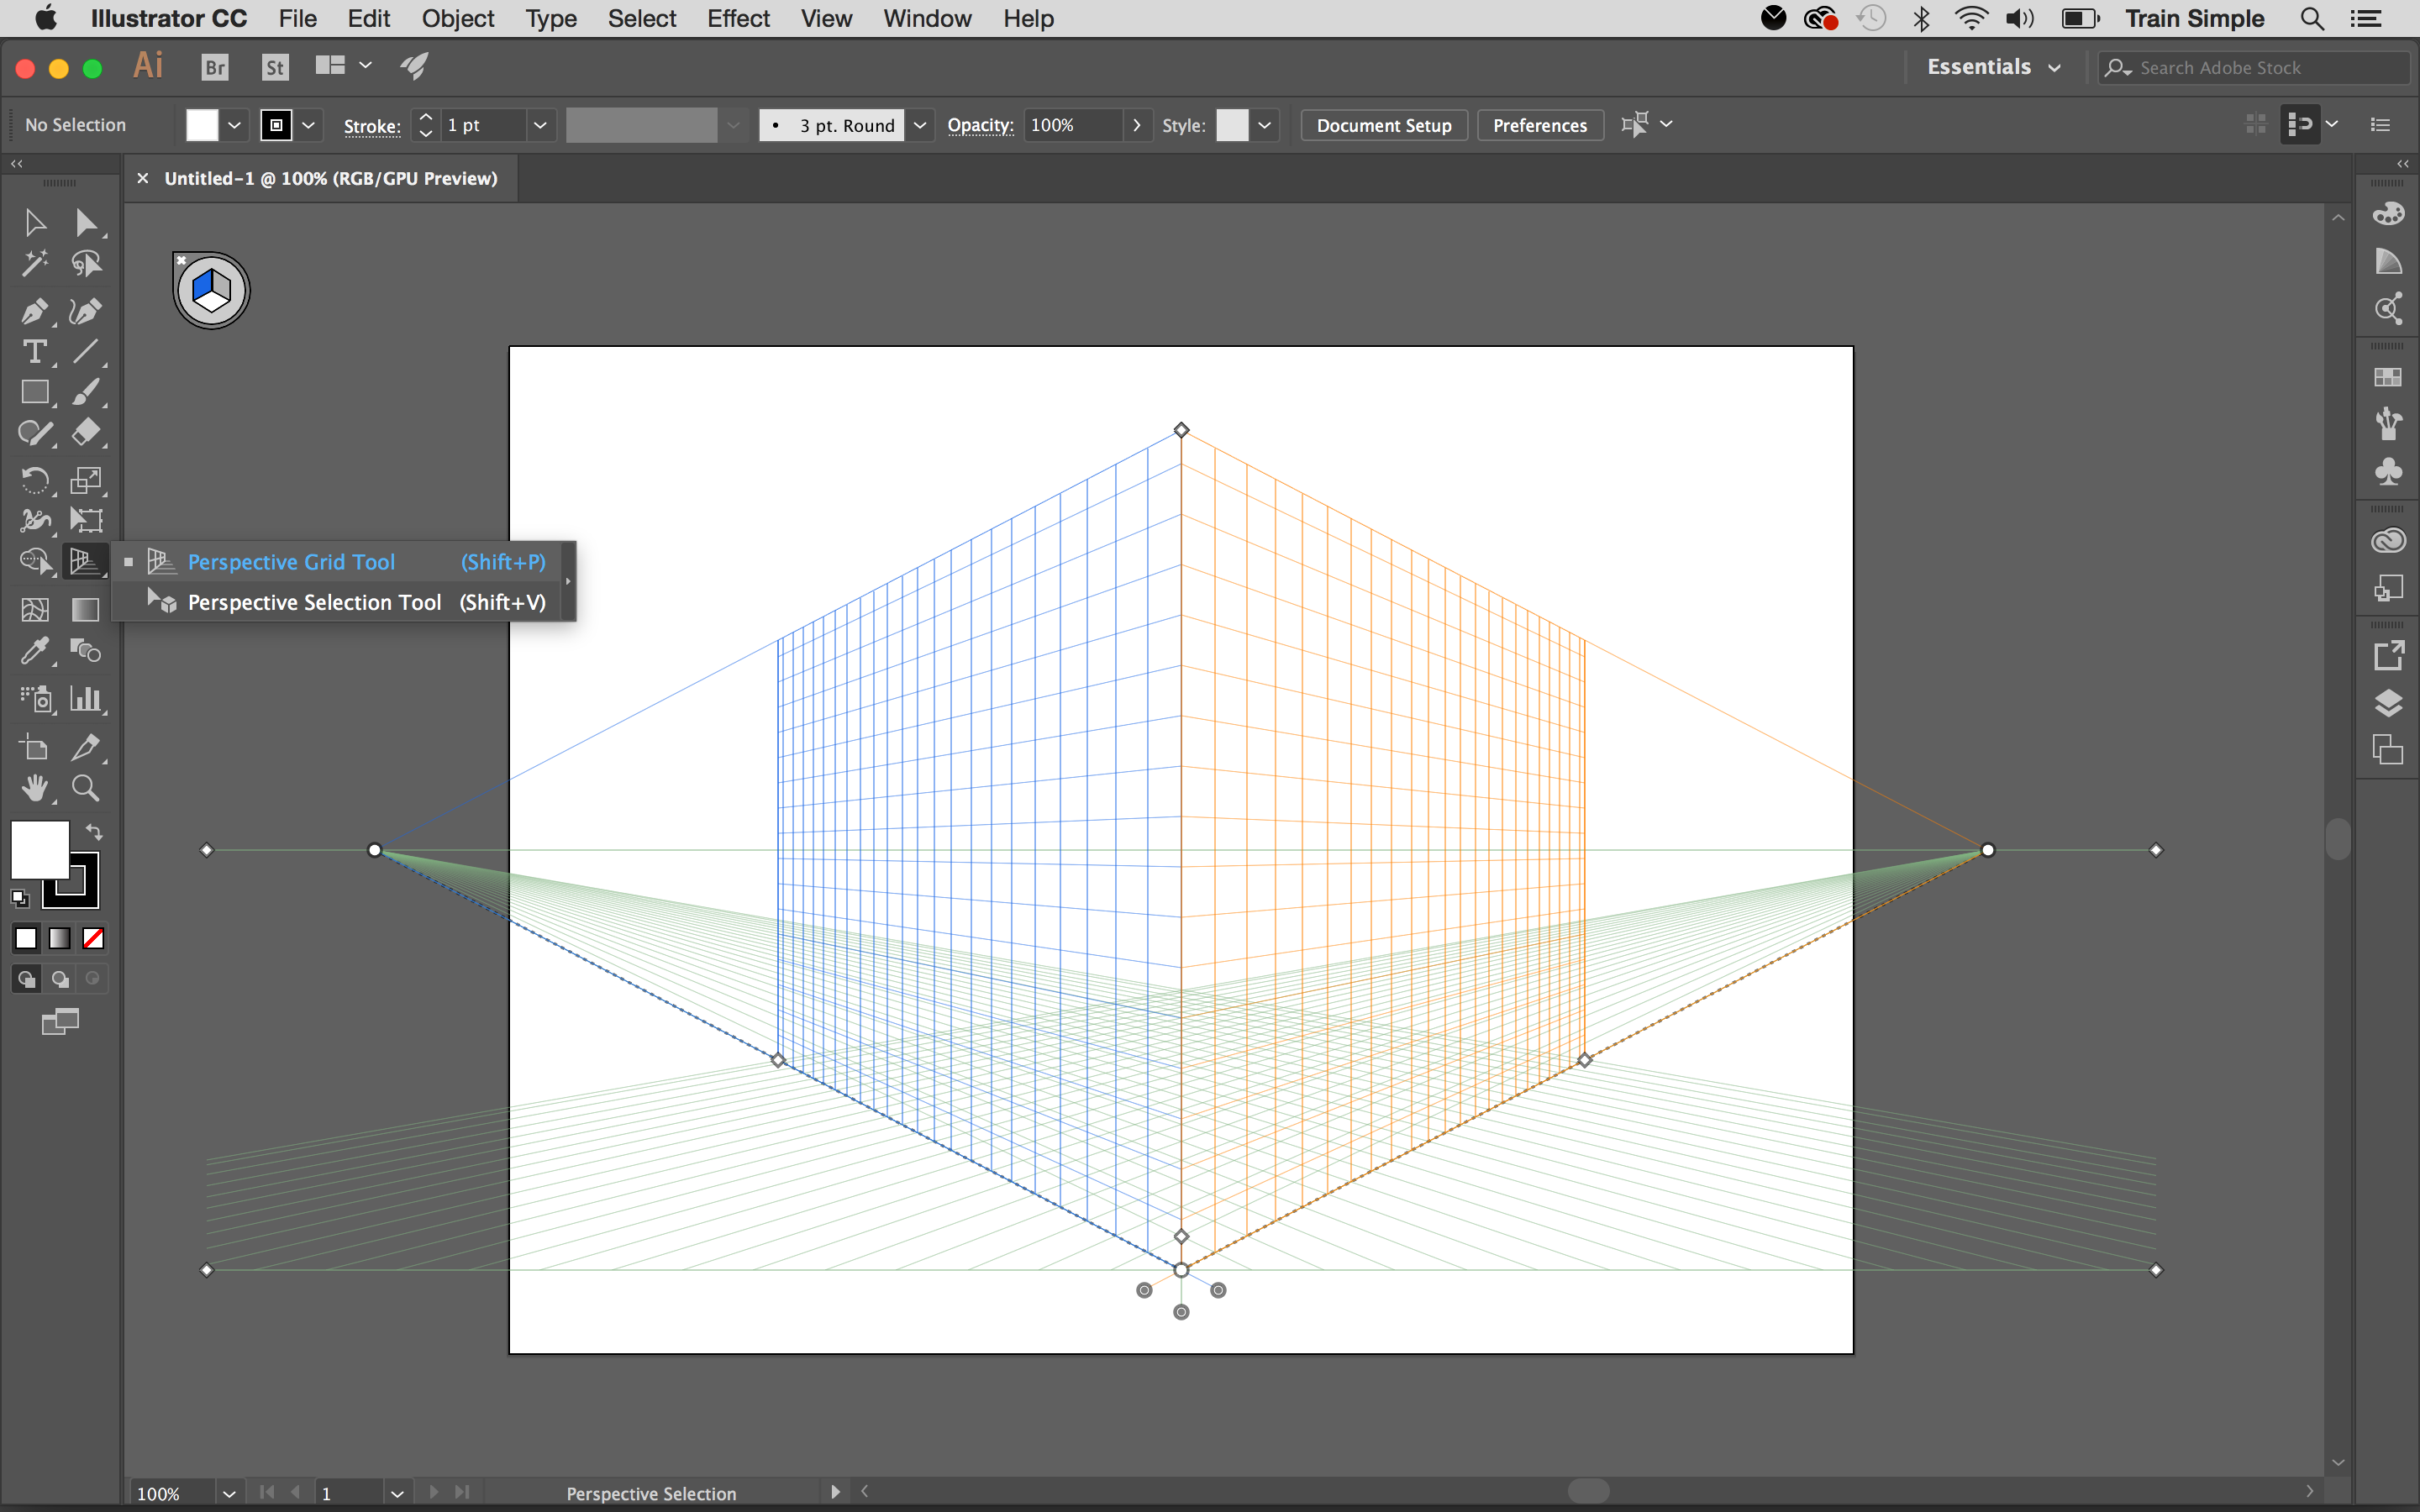
Hit the Perspective Grid tool from the tools panel or press shift+P. A default two-point perspective grid and a plane switching widget will pop up in your document.
You can use the widget to select the active grid plane. If you click the left surface of cube or press 1, its colour will change to blue indicating that left plane is active. And if you click the right surface of cube or press 3, this plane will turn orange to indicate this is now the active plane. Similarly, if you click the bottom surface or press 2, it turns green indicating horizontal plane is your active plane.
- How to draw: the best drawing tutorials
In Perspective Grid, an active plane is the plane on which you draw an object to project the observer's view of that portion of the scene.
03. Select the grid type
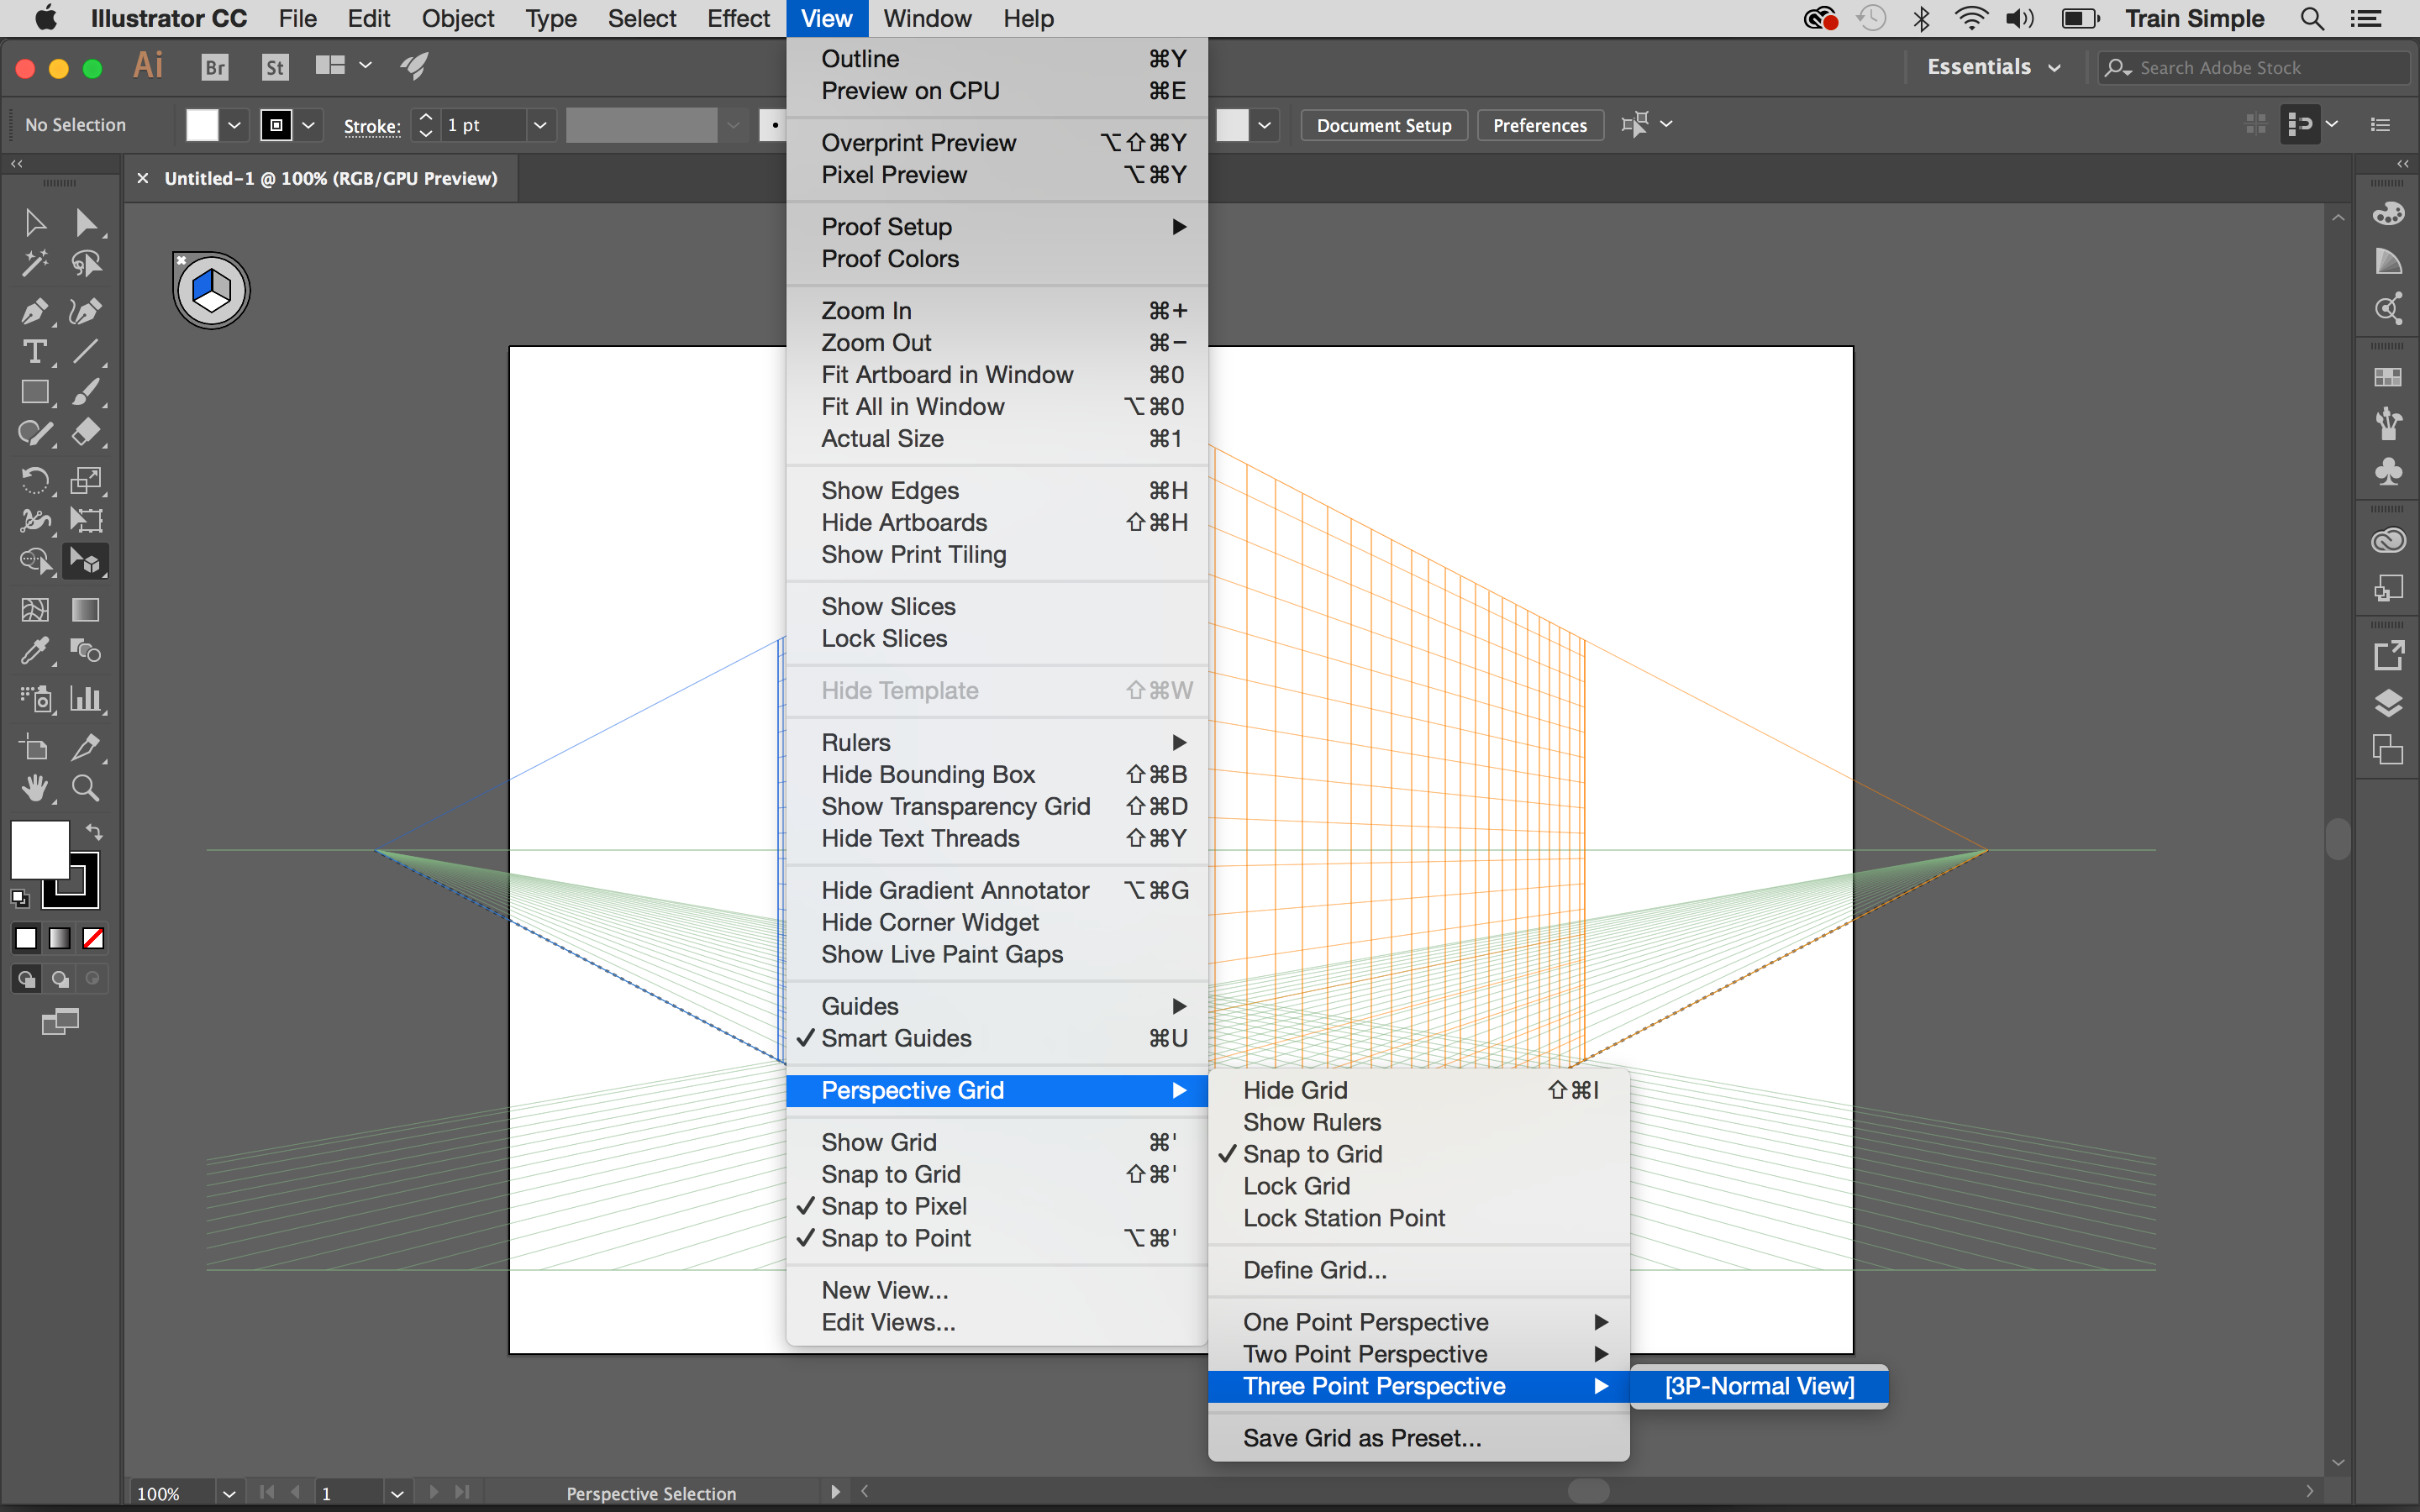
There are three types of grids available to choose from: one-point, two-point and three-point. You can select the desired grid by going to 'View > Perspective Grid > One/two/three Point Perspective'. We'll use three-point grid for this tutorial. Below you can see its basic structure.

The first thing you should know is you have full control of the grid. With the Perspective Grid tool selected, you can click and adjust any handle in the grid as you like.
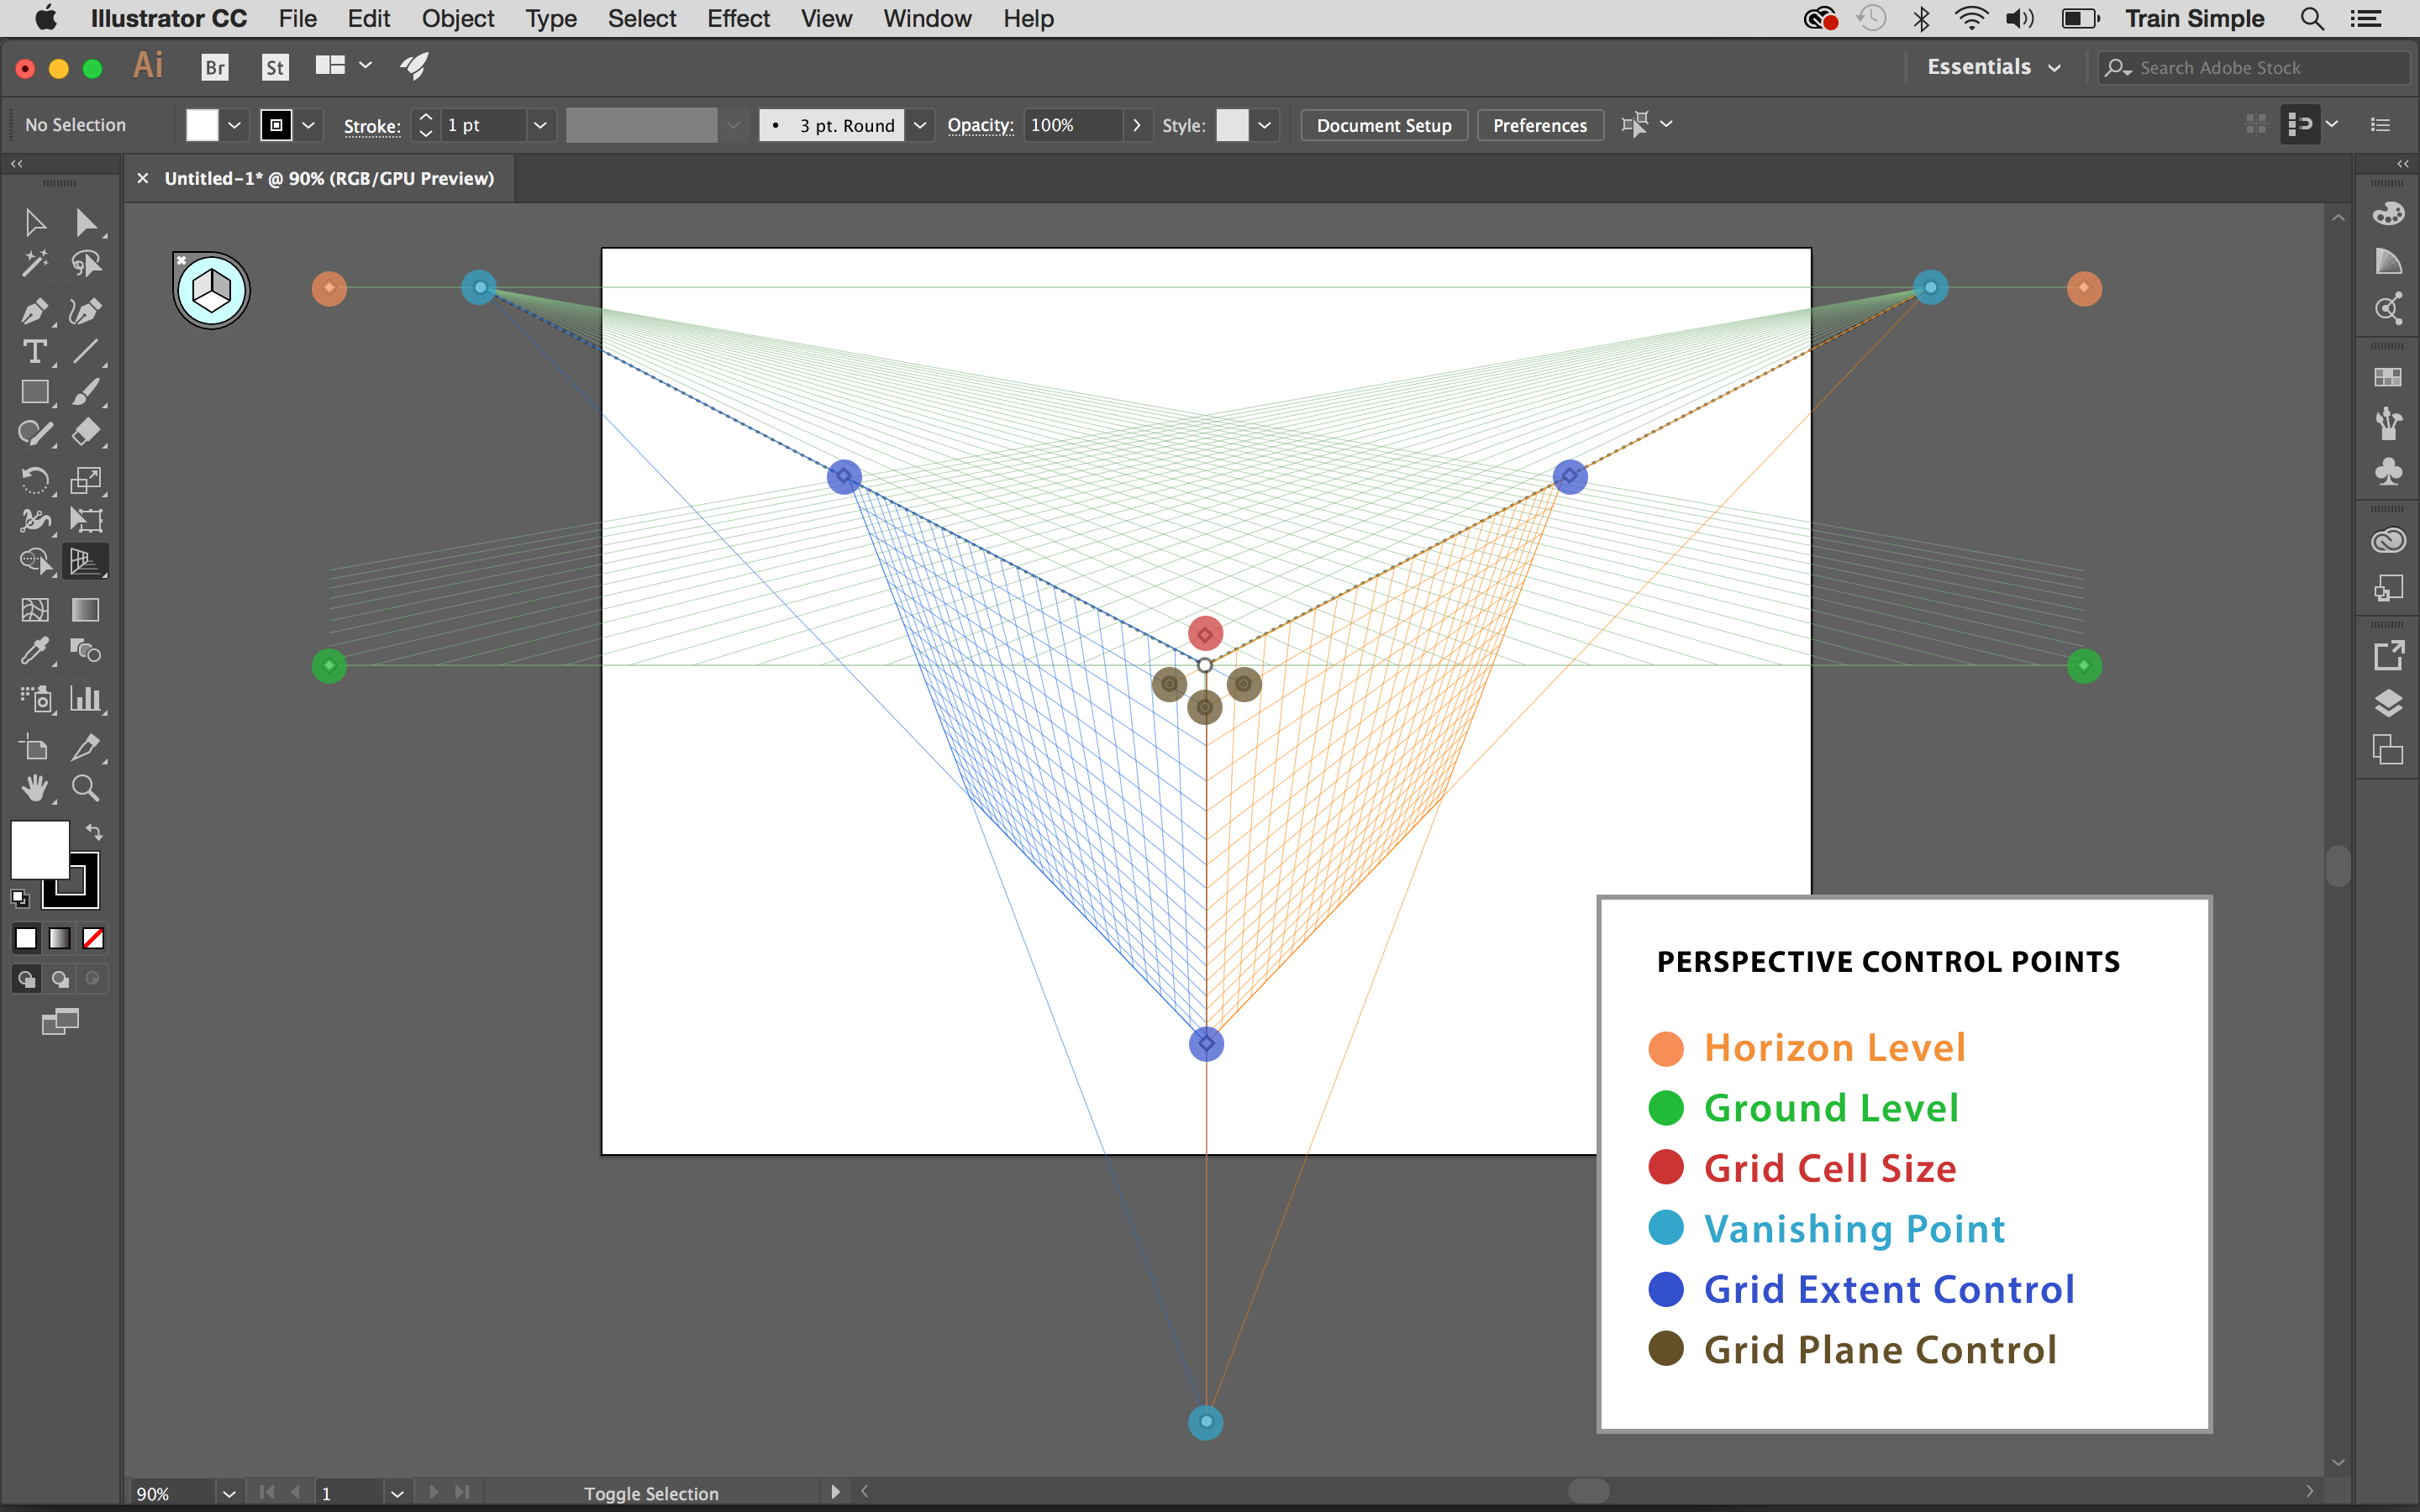
You can drag the right or left vanishing point horizontally, and the central vanishing point vertically to adjust the size of the respective planes.

If you lock the station point using the 'View > Perspective Grid > Lock Station Point' option, both the vanishing points will move together.
04. Adjust grid planes and grid cell size
You can also adjust the left, right and horizontal grid planes using the respective grid plane control widgets. Adjust grid cell size using grid cell size widget – if you drag it upwards it increases the cell size, and vice versa.
05. Customise your grid

There is another way to customise your grid. Go to 'View > Perspective grid > Define perspective grid'. I mostly use this option to decrease the opacity of the grid so I can concentrate more on my artwork.
06. Create the sides

With all the basics in mind let's start drawing. If you have made any changes to your grid controls while experimenting, just go to 'View > Perspective grid > Three point perspective' to return to the default three-point grid.
The only change we'll make to this grid is to decrease horizon height by moving the horizon line down, closer to the ground level.

Press shift+cmd+I (shift+ctrl+I) to temporarily hide the perspective grid. Now pick the Rectangle tool (M), click the canvas to view its dialog box and enter 200px for width and 170px for height. You can make this rectangle any colour.
Next, we'll make two copies of our rectangle. Select it by clicking it using the Selection tool (V), then press cmd+C to copy and cmd+V to paste. Now you have three rectangles, which will form the two side walls and lid of the box.
07. Drag the rectangles to create perspective
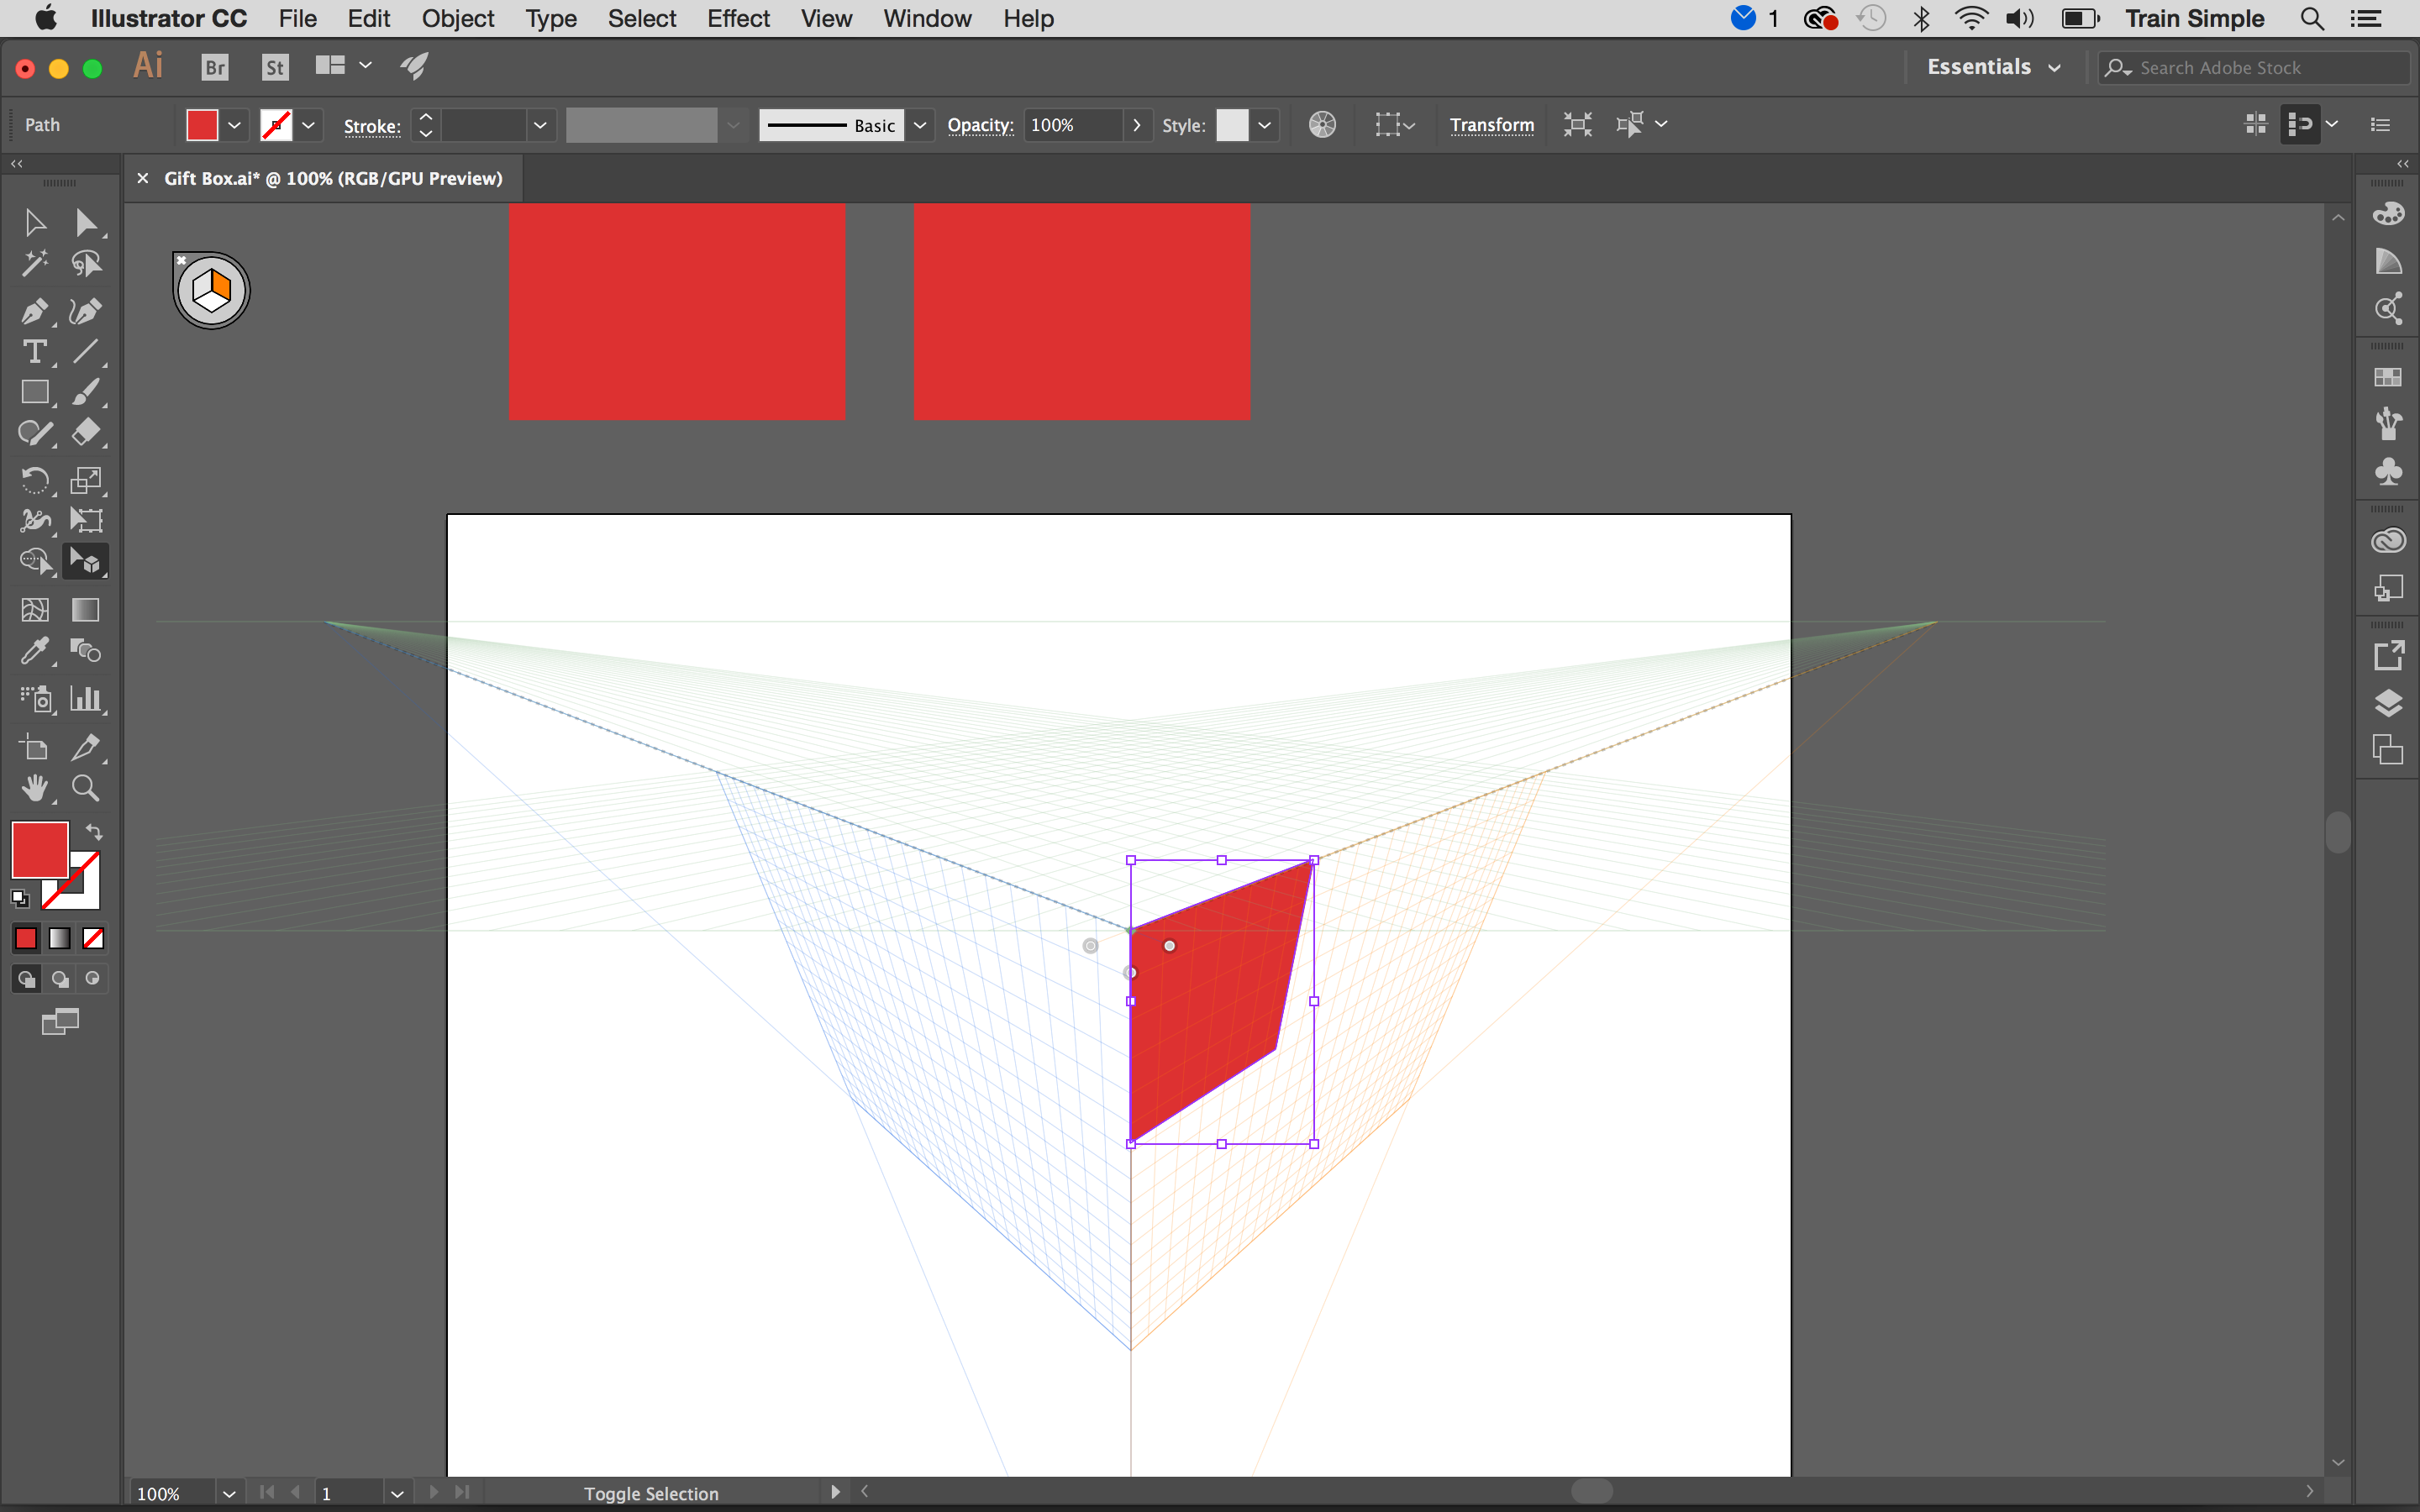
Press shift+cmd+I to view the grid again, pick the Perspective Selection tool (shift+V), select the right grid by pressing 3 and simply drag one of the rectangles over the grid as shown below. The rectangle will automatically come into perspective.
Next press 1 to select the left grid and drag another rectangle adjoining the previous one.
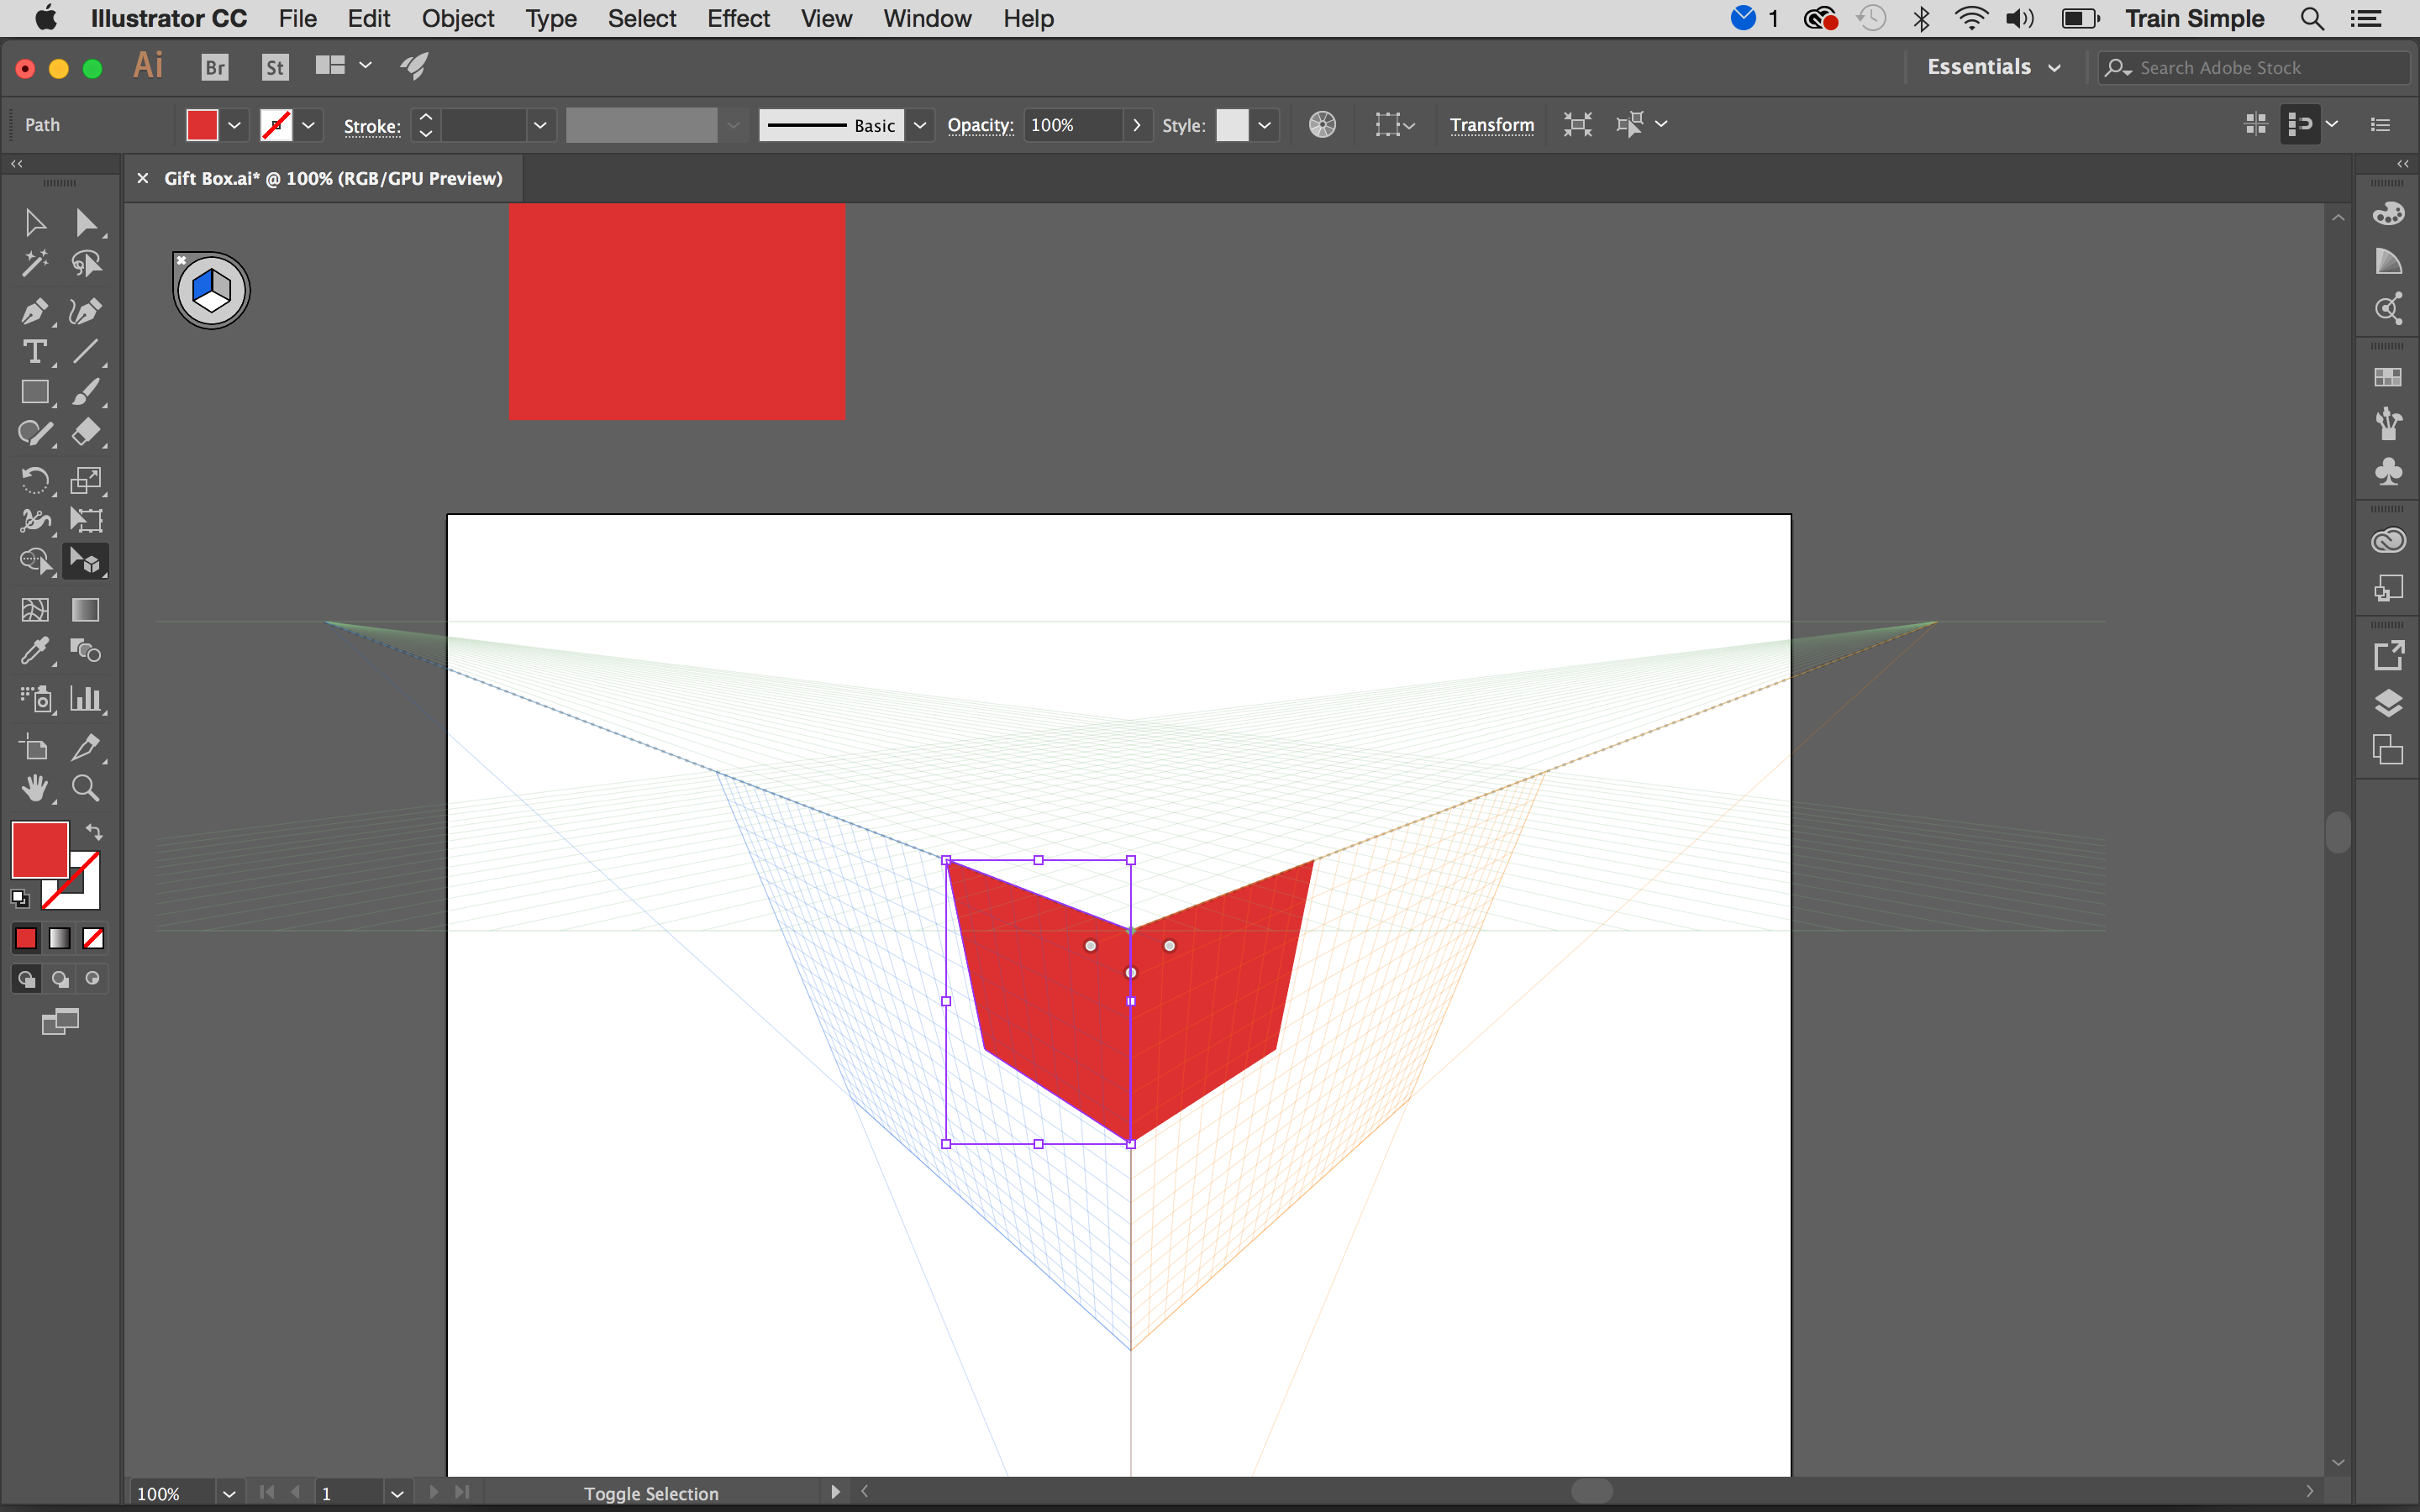
Press 2 to select horizontal plane and position the third rectangle to form the lid. If it's not in proportion with the walls, you can resize it using the Perspective Selection tool (shift+V).

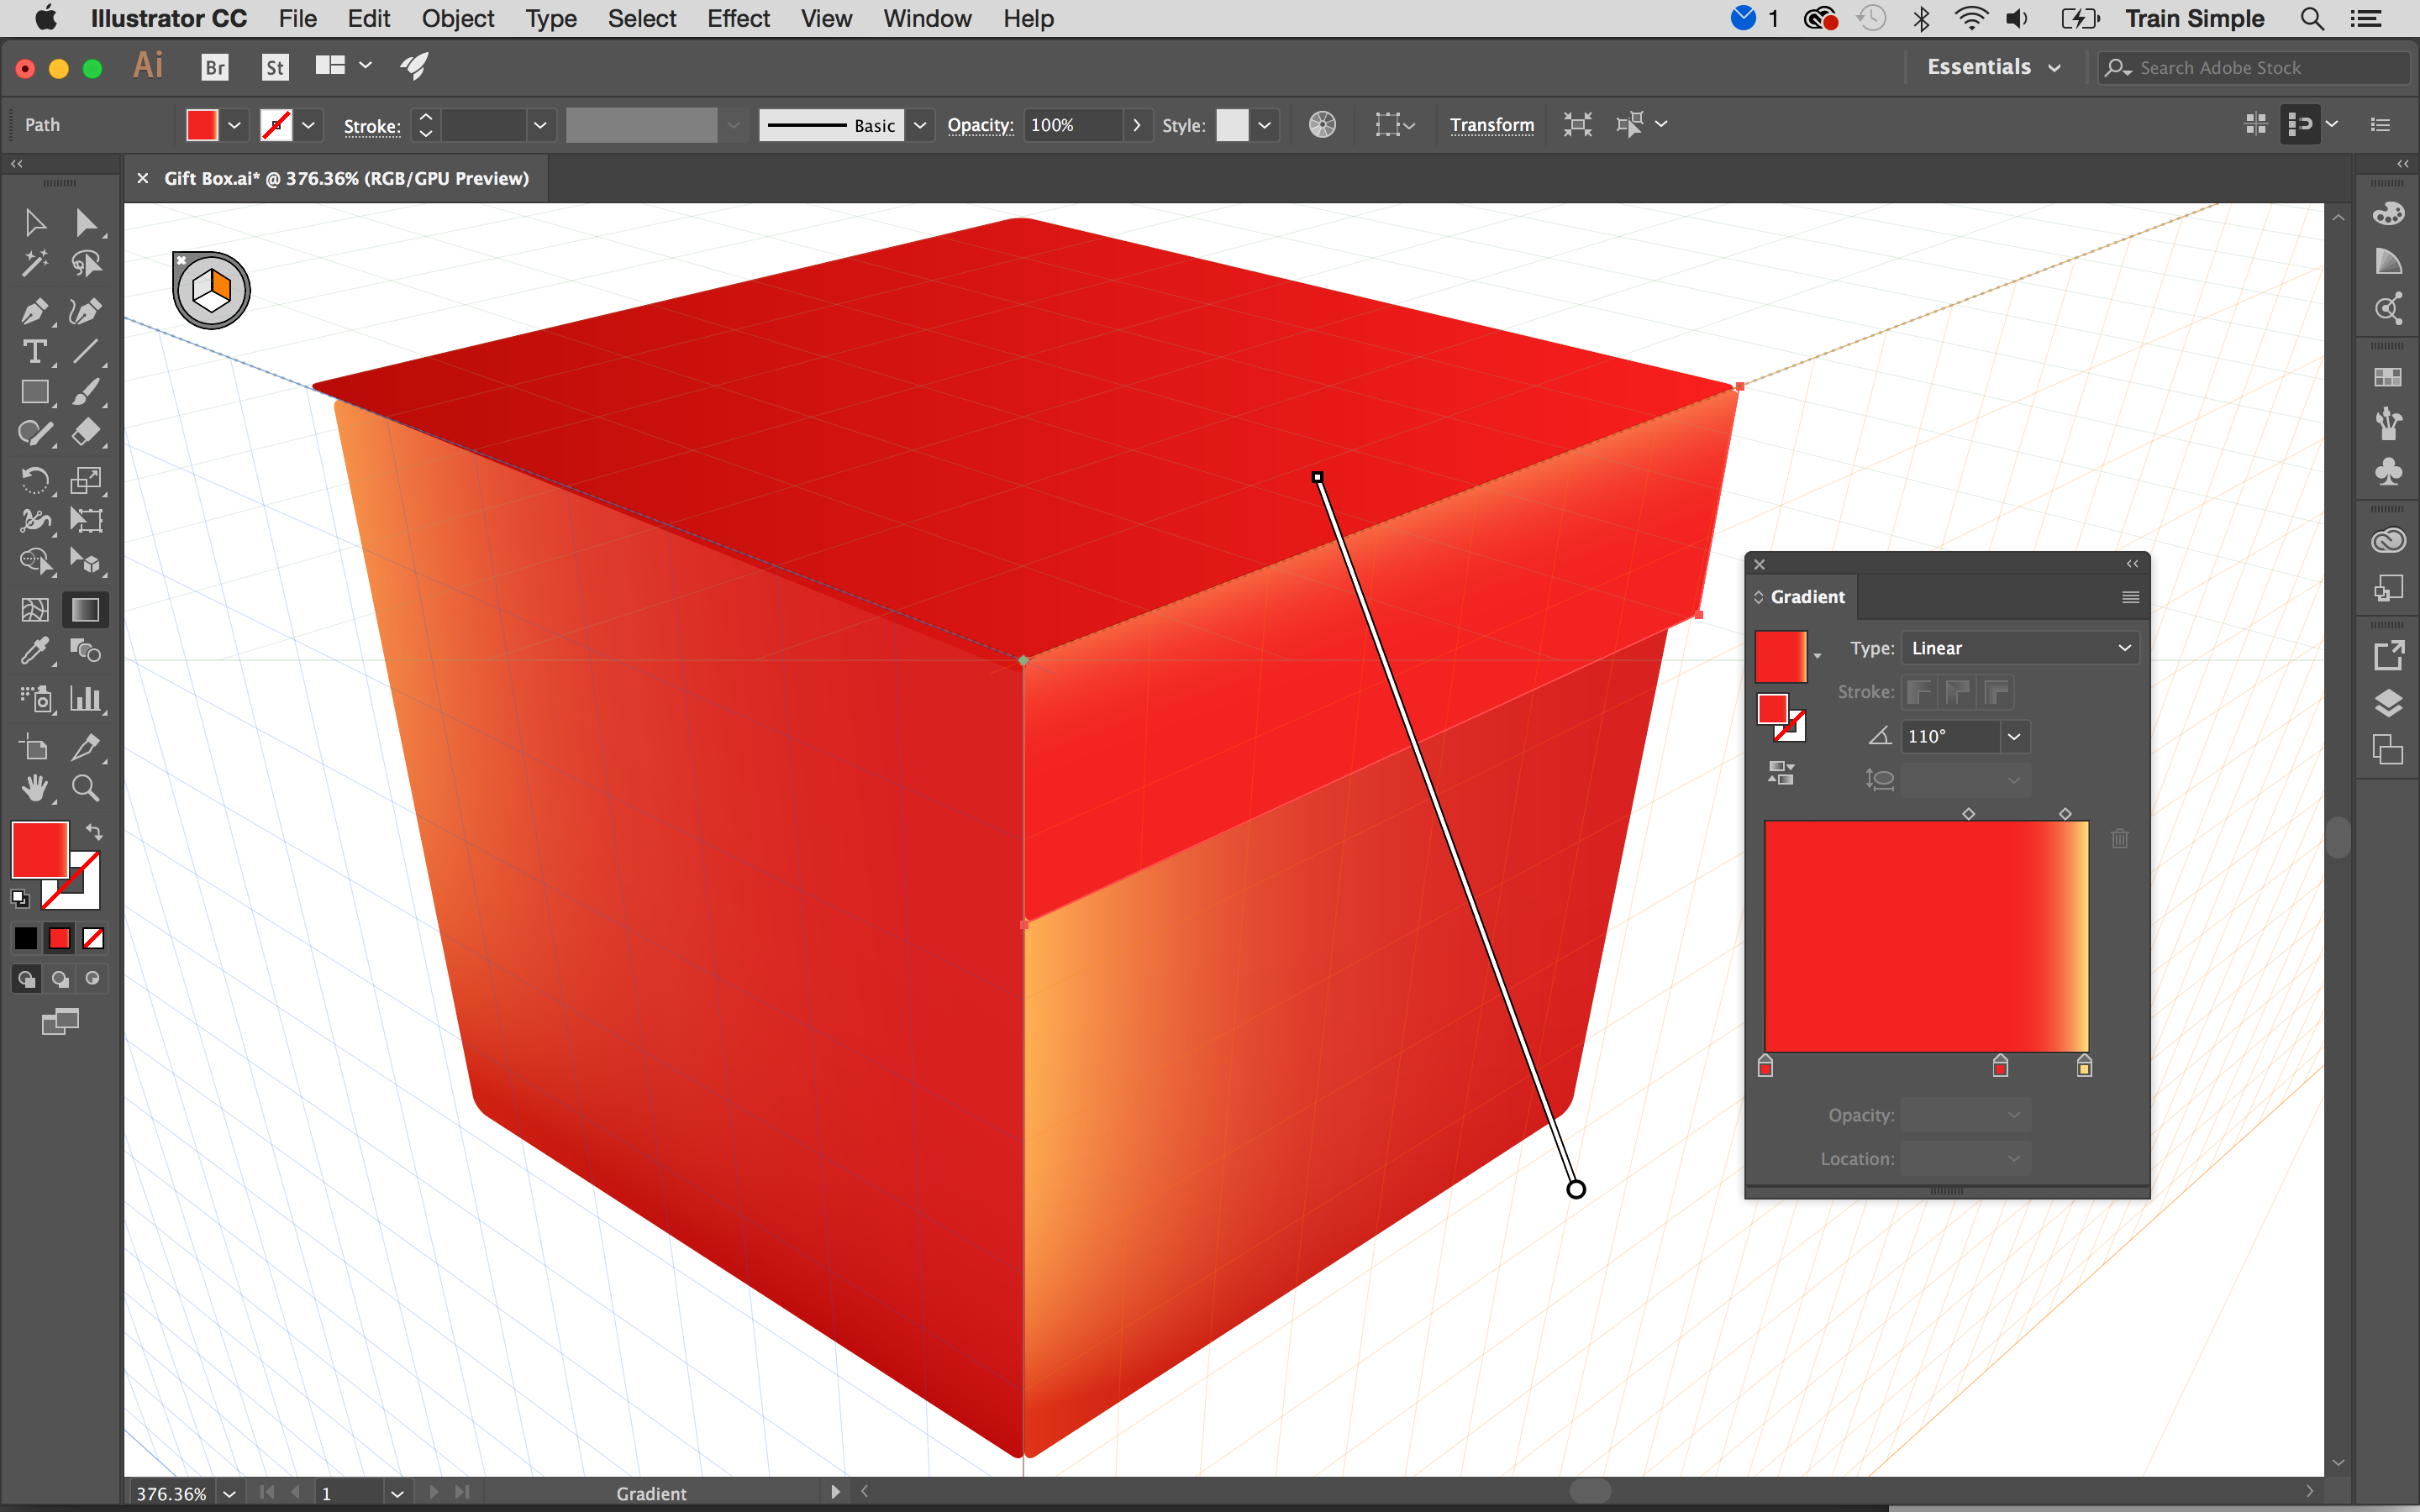
08. Apply following gradient

Now select the right wall of box and apply following gradient on it using the Gradient tool (G). You can save this gradient by hitting the 'New Swatch' icon at the bottom of the Swatches panel.
Now make a copy of the right wall. While the wall is selected press cmd+C to copy, and cmd+F to paste in front. Apply the given gradient to this copy and save the gradient as a new swatch.

Now apply both the gradients over the left wall from the saved swatches. After that, apply following gradient over the lid.

09. Add the lid detail
Increase the size of lid a bit using the Perspective Selection tool (shift+V). Press 3 to select the right grid and draw a rectangle using the Rectangle tool (M) as below. Then apply the given gradient.
Hit 1 to select the left grid and create a rectangle on the other side. You can apply the same gradient, but you'll need to change its angle a bit.

Next page: the final steps to creating a gorgeous 3D gift box...
Source: https://www.creativebloq.com/how-to/how-to-draw-your-art-in-perspective-using-adobe-illustrator
Get Rid Of Perspective Grid Tool Illustrator
Source: https://ferrelltwoned.blogspot.com/2021/11/get-rid-of-perspective-grid-tool.html
Posted by: rineharttring1983.blogspot.com
0 Response to "Get Rid Of Perspective Grid Tool Illustrator"
Post a Comment